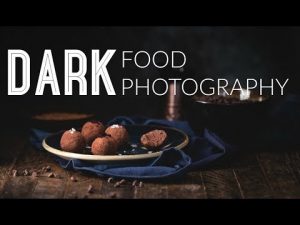
Bloggers Trend Keeping You Up To Date
The popular style of photography on food blogs on Instagram and even in recipes with books – “chiaroscuro” photography (also known as “dark photography” or literally “chiaroscuro”) is often characterized by strong shadows and dramatic mood of the pictures. However, what really characterizes this style is the skillful interaction between deep shadows and light areas that serve to highlight an object. Japanese food photographer Reiko Nanto shares the tricks of creating mouth-watering images using the chiaroscuro-style photo capture method.
Click here : Buy Pakistani Stock Images
EOS 5D Mark II / EF85 mm f / 1.2 L II USM / FL: 85 mm / Manual exposure (f / 13, 0.3 s, EV ± 0) / ISO 320 / WB: Manual
The biscuits had the theme “Alice in Wonderland”, which inspired the photographer to stylize the shoot after drinking tea in the forest. Reiko used a black reflector (also known as a black flag) in order to emphasize shadows and a dark background. Note that areas with white glaze are sufficiently illuminated – otherwise the image may look dull. To prevent the cookies from looking too flat, the photographer raised it with some stylized supports and took off with side lighting.
Tip 1: control both light and shadow
Do not forget that chiaroscuro means “chiaroscuro” and not just “shadow”. Although this style is commonly referred to as “dark photography,” you won’t get a successful chiaroscuro shot just by underexposing it. The beauty of such an image lies in the skillful use of the contrast between light and deep shadows.
- Subtle details in lighting are important. For a good chiaroscuro-style shot, you need to make sure:
- that your lighting is soft enough to highlight a three-dimensional object
- and that the transitions between light and shadow areas are smooth and gradual.
To achieve these goals, you need to manipulate light and shadow. Reiko does this by creating paths that determine how light penetrates the image, and uses a black reflective panel (or even several) to create enough shadow on the image to sense tension.
Recommendations
Side lighting: This angle of light makes it easier to create more vivid contrasts of light tones. Dark color background / background elements : Dark colors absorb light and add shadows, perfect for giving a chiaroscuro look.
Successful shot
EOS-1D X / EF28-70mm f / 2.8L IS USM / FL: 70 mm / Manual exposure (f / 6.3, 1/50 sec, EV ± 0) / ISO 500 / WB: 4700K .This monochromatic image was obtained with the stylization of a white snowball cookie, a black tray, cutlery and a gray base. Lateral illumination on the right smooth transitions between light and shadow areas, directing the viewer’s attention to cookies and a textured base.
Lighting setup
- A: A hole has been created for the entrance of light.
- B: Creates shadows and tonal transitions between light and shadow at the base.
- C: Use a black reflector to absorb light and add shadows.
The photographer used black reflectors to block the area around the subject. They also serve to enhance shadows on the subject. The light was directed at the scenery through the hole on A. Extra tip. You want to create a muted atmosphere. Too much light will lead to sharp contrasts between areas of light and shadow. Use a lace curtain or diffuser to soften the light.
- Stylization of the picture: the key is in the background.
- Dark background
- Light background
When taking a photo made in the chiaroscuro style, select something dark for the background / base. The dark background absorbs light and emphasizes the shadow – like a black reflector. On the other hand, light backgrounds reflect light and soften shadows, which is the opposite effect of what you want to achieve in a photo using chiaroscuro.
The difference between a chiaroscuro-style photograph and an underexposed photograph.
- Chiaroscuro photo
- Underexposed photo
Chiaroscuro photo: the shadows were specially created so that the food looked more contrast. You can almost imagine that it hisses because of how it shines, but note that the bright areas are still under control so that there is no light exposure.
Underexposed shot: overall – just dark. There are no contrasts between light and shadow areas.
Tip 2: Don’t make food wait while you prepare to shoot! Do all the preparatory work in advance.
Two important principles for food photography
Shoot while the food is fresh, fresh from the kitchen. The longer you leave her to “wait” for her hour, the less tasty she will look. Work fast. Remove hot foods while steam is still coming from them, and cold foods before they start to melt noticeably. If you want your images to look appetizing, the most important key to the goal is to take a picture when the food has just been brought from the kitchen. Prepare as much as possible for the shooting before the food is ready. Given all the necessary small settings for the angle of illumination, the whole preparation will take a certain time. Do as much technical work as possible before the food is ready, or even before you start cooking it.
Procedure
- Refine your background, finalize the plates and cutlery, style and lighting.
- Take a few test shots of the plates in the desired position (without food).
- Determine the distance at which you will take pictures, the angle of shooting, the focal length of the lens, camera settings and composition technique (for example, the classic “Rule of Thirds”).
- Ideally, all you have to do after this is put the food on the plates and then release the shutter .
- Extra tip: mount the camera on a tripod . This will keep the camera still if you need to change the exposure, aperture, or focal point settings during shooting.
- EOS 5D Mark II / EF24-105 mm f / 4L IS USM / FL: 88 mm / Manual exposure (f / 5.0, 1/60 sec, EV ± 0) / ISO 400 / WB: Daylight
- Here, the photographer decided to use a relatively “western” style, in contrast to the traditional Japanese. The combination of East and West creates an elegant, sophisticated image. For this shot, in addition to ensuring the rhythm and visual appeal of the layout, she also wanted to highlight the details in the texture of the ice cream cones and provide smooth, gradual transitions between areas of light and shadow. This required a lot of small adjustments during the test shoots.
- During the shooting of test photos, Reiko not only adjusted the angle of illumination and decided on the location of the black reflectors, but also on the location and layout of the ice cream cones. Using a tripod helped keep the camera still for a long time. The photographer scooped ice cream only after all the preparatory work was completed.
The key is to capture bright areas correctly.
If everything is done correctly, you can make soups and products with sauce and gravy more “juicy” and mouth-watering in the frame. The angle of illumination is important. Select side lighting or half backlight, and then shoot diagonally above the subject. Gloss should occupy no more than twenty or thirty percent of the food. If there are too many shiny areas, the food will look overexposed; if they are not enough, it will not be visually attractive and cause proper appetite.
EOS 5D Mark II / EF100mm f / 2.8L Macro Shot USM / FL: 100 mm / Manual Exposure (f / 6.3, 1/40 sec, EV ± 0) / ISO 400 / WB: Daylight
For this shot, the photographer tried not to make the aperture too wide, since too strong a defocusing effect can obscure the details in highlights and on the dishes.
For more information visit our website: https://imagesmall.com